Showing posts with label baking. Show all posts

Wednesday, March 10, 2010

Eye-catching Ice Cream Cone Cupcakes

We have another big birthday coming up around here. Miss Nora will be turning five in a couple of days. We've already sat down together for the official birthday cake consultation. Along with that important decision (that changes daily), we sorted out exactly what kind of treat she will bring to celebrate at preschool. Cupcakes were a nobrainer, but the type of cupcake was another story. It had to be different and in Nora's wiser-than-age-four voice, "It had to catch the eye" (yeah, she really said that.) This ice cream cone cupcake won in a close battle with caterpillar cupcakes. I found the basic idea for these in a Good Housekeeping article saved from several years back.

After baking up 24 or so vanilla cupcakes, I gathered two types of frosting, Redhots, non-pareils and vanilla wafer cookies. I cut the vanilla wafers in half and then trimmed each half into a triangle shape.

Next, I frosted each cupcake with chocolate icing and added a triangular vanilla wafer for the cone.

Then using a large star decorating tip, I generously piped on the lavender icing for the ice cream.

I finished each cupcake with a Redhot for the cherry and non-pareils for the sprinkles. They turned out so cute and came together way faster than those reindeer. I made a few extra to taste-test after which my client gave her final seal of approval. Nora is *very* excited to come to school tomorrow with her special birthday treats. Now to narrow down that cake.


*find more recipe ideas over
here (one of my favorite blogs.)

Sunday, January 24, 2010

How to score points with an 8-year-old

If you asked me to explain Pokemon in 100 words or less it would go something like this: errrr...little alien-like creatures with different powers...ahhhh...expensive trading cards that 7-8 year old boys can't get enough of...some cards having lots of power while others not so much...errrr...battling?...hmmmm. How's that? Yes, my understanding of the world of Pokemon is rather deficient. I did learn just a tiny bit more when I went to research this popular yellow guy for my son's birthday cake. For example, did you know that Pikachus' can shoot electric from their cheeks? me neither.

Here's the plan I came up with to use the majority of two round cakes to build Pikachu. The small striped triangle on cake number two is the only piece not used. It can be thrown to any kitchen intruders to keep them at bay while you're decorating the cake.

I decorate our cakes with butter cream icing mainly for the taste even though fondant would probably be easier. This guy is all icing except for the red cheeks and mouth which happen to be strawberry fruit rollups.

The cake ended up being a huge hit with this 7-year-old turned 8. Besides my getting to know that happy little yellow Pikachu better, I even earned a few cool points upping my evolutionary Mom status. Yeah...I'm trying to sound all pokemonish. My apologies to the diehards...I did say "a few" cool points.

Wednesday, December 30, 2009

One sweet iPod

I'm finally back. I see that Penny did a nice job of filling you in while I was baking, wrapping, entertaining, cooking, laughing, enjoying and eating...way too much eating. And like she said, two days after we're Merry Christmasing, it's time for Happy Birthday. ahhhhh yes...the Christmastime Birthday syndrome...Ours is a cute 11 year old girl who happens to now own a green iPod.

So here's a peek at the cake I came up with to kick off her year. Simple...really. Just a cake baked in a rectangular 9" x 13" pan and frosted in iPod green with white and black for the details. The little wires are red licorice left over from the Rudolphs and the ear buds are mounds of white icing with a few details piped in black. Granted everything would look sleeker in fondant, but for taste we all prefer plain old buttercream icing.

Off the subject of cake, are iPods A*M*A*Z*I*N*G or what??! I remember my black/no color Walkman...kindoflike having a stereo attached to your waist. And those
headphones?!? (I'm betting very few birthday cakes were modeled on that technology.) More confirmation that Mom and Dad truly lived with the dinosaurs.

Wednesday, December 16, 2009

Your vision is fine: That IS a lot of Rudolphs

Have you had too much sugar yet? These guys went to preschool today along with me and the preschooler herself. The first time I made Rudolph cupcakes was about 6 years ago for my oldest after I spied them in Family Fun magazine (check out the link if you need a festive snack idea in the next week.) With this latest batch, all that's left is a crumb or two and me vowing to lay off the high calorie posts for at least a week. Yes, I will paint again...

Sunday, December 13, 2009

a really fast + easy = candy recipe

I won't lie to you. I do make a ridiculous amount of candy this time of year, some types more involved than others. The more complicated varieties come together when the elves are at school or in bed to avoid holidaycandymakingstress, a real condition. This however, is an easy recipe for delicious candy treats that even preschool elves can make by your side. Around here we call them reindeer noses. To make your own, you'll need:

ring-shaped pretzels (can be hard to find...Meijer's store brand has them or just use mini pretzels)
rolo candies
m&m's

First, unwrap the rolos. Put the rolos on a baking sheet and throw them an inner tube/pretzel ringing each rolo. (If you are using a different shaped pretzel just place your rolo on top and call it a raft.) Place in a preheated 275 degrees oven for 4-5 minutes.

Remove from oven. Immediately press a m&m into the center of each melty rolo. Leave the candies on the baking sheet until they are cool and hardened.

That's it...*really.* Place on a festive dish and enjoy!


*Linking some good advice here about embracing holiday baking shortcuts (and I'm totally with Jen on the 80% off gingerbread in the attic ; )

Monday, December 7, 2009

Tornados and gingerbread

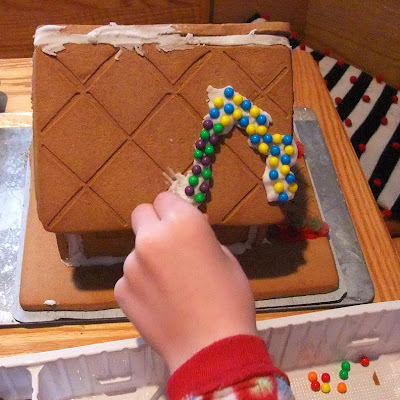
Yesterday, with all the fixings, my three sugarplums spent the afternoon assembling and decorating the gingerbread houses left for them by St. Nick.

This has become a fun tradition that we do every year. I crank up the Christmas music and think about how (I'm sure) this will be a fond memory of their childhood.

This house had serious structural damage/crackage from the start. Perhaps St.Nick should think twice before being tempted to buy these a year in advance (you know when gingerbread house kits are 75% off and "he" reasons that no one eats the things anyway so why not save a little cash and keep them around until next year? eh hem.)

I found it quite humorous that the kits included the following note in the directions: "Do Not become DISTRESSED if your house cracks. Just repair with icing." Same thing for roof slidage. Luckily no one became "DISTRESSED" and a very cheerful afternoon was had by all...even if this year our gingerbread village looks like it suffered some sort of unfortunate weather related event.

Sunday, November 15, 2009

When Autumn gives you apples...

Homemade apple pie is something I crave every fall...errrr actually I crave throughout the year, but even more so when the leaves are changing and the air is crisp. I've found the best apple pie is made with a combination of different apples for a variety of tastes in each slice. My favorite mix is Granny Smiths and Jonathans. I also prefer a crumb topping rather than a top crust. Without further chitchat, here's my favorite recipe for a delicious apple pie.


apple filling:
6 cups thinly sliced, peeled apples
1/2 cup sugar
3 tbsp. all-purpose flour
2 tsp. ground cinnamon
1/8 tsp. salt

The bottom crust can be your favorite single crust pie recipe or a refrigerated Pillsbury crust...promise, I won't tell ; ). Line the pie plate with the bottom crust and add a fancy cookie cutter edge, if you desire. Then fill with the apple mixture from above.

To make the crumb topping, stir together:
1 cup packed brown sugar
1/2 cup all-purpose flour
1/2 cup quick-cooking rolled oats
Use a pastry blender to cut in 1/2 cup butter or margarine till the topping mixture resembles coarse crumbs.

Sprinkle the crumb topping over the apple mixture. To prevent over browning, cover the edge of pie with foil. Bake in a 375 degree oven for 25 minutes. Remove foil and bake for 25-30 minutes more until the pie top is golden.

Remove from oven and cool. Send hubby to store for forgotten vanilla ice cream and enjoy.

I'll be back soon. Many projects were wrapped up last week so now I'm enjoying time for things like pie, crafts and our nearly complete renovated bathroom! Hurray for Fall!

Also perfect for the season...a recipe for Gratitude rolls over here.

Monday, August 24, 2009

i love back-to-school?

hmmmm...still undecided over here. While I do appreciate having more time for uninterrupted work, I'll miss the laid back days the summer brings. I think my kids have mixed feelings too. They love seeing their friends and moving up a grade, but at the same time school is a full-time job with work involved. My kids (with the exception of the preschooler) go back tomorrow so we're spending the day making sure we have all of the supplies on the list.

In addition to the first case back here, I finished sewing personalized pencil cases just in time for my other two back-to-schoolers. They got to pick their fabric and I took it from there.

My second grade boy...what more can I say?

In the spirit of back-to-school, I'm including my lunch survey which ran in the December/January edition of Family Fun. You can go to Family Fun to download a copy or since you're here scroll over to the right in my "Printables" section. Click on lunch survey to read about the inspiration and then click on the survey itself to print. Fold this up with a pencil and place in their lunchbox. You'll find out all kinds of tidbits about those first days of the new school year.


Another tradition we've had around here is a back-to-school cake. There's nothing like a cake to sweeten a special day. For this cake, I used the basic plan of the Family Fun School Bus cake. Since we don't have bus service, our method of transportation is minivan carpooling. I adjusted the school bus cake as necessary including the "harried mom driver." I think we're almost ready. I love back-to-school. And repeat.

Wednesday, May 27, 2009

Our waffle house

Breakfast for dinner happens around here at least once a month. It's quick, easy, inexpensive and ever so exciting. If you're within say 10 miles or so you can probably hear the screams of glee when I announce "Waffle Night." My kids are trained to hear when I get the waffle iron down from the top shelf..."Waffles Mom, you mean we're haViNG WAFFLES!!" running footsteps to tell the others.

Subbing half whole wheat flour (instead of all white) when making the waffle batter ups the nutritional value as does a good slathering of homemade blueberry sauce.

I tweaked and modified another recipe to come up with this one that I call my own. Quick, easy and delicious. You are more than welcome to try it out (and not just with patterned circles.)

And yes on waffle night we do it up right. The powdered sugar shaker comes out along with dollops of whipped cream and a bit of sausage on the side. Life is too short to miss out on waffle nights.

Note: here's a great link for smoothies if you have some extra frozen blueberries.

Thursday, March 26, 2009

PB and rain

After two solid days of rainy weather, I couldn't take it any more. This called for action.

With two assistants/spring breakers on hand, we whipped up a batch of our favorite cookies.

shhhhhhh....my secret is to use a potato masher instead of a fork for the patterned tops. I experimented with other kitchen utensils way back here to make cookies that looked like these, but the potato masher is still my all time favorite.

Yes, the sky is definitely looking brighter now (not really...butwhocares...we have cookies in the house.) If you're looking out at umbrella weather, may I strongly suggest some cookie therapy. It works for us.

Sunday, March 15, 2009

Miss four finger's pink pony

I can hardly believe that my youngest turns four today. That happened in the blink of a pink pony. Speaking of which, she had a really hard time deciding on a cake this year. First, she wanted last years cake. Then there was a stream of other ideas, finally deciding that the cake should indeed be a pony. I made the pony pink while she napped because everybody knows that a pony is pretty great, but a pink anything is 10 times better.


This is how the pony came together. Nothing too complicated...just a cake baked in a 9" x 13" pan...cut and pieced like so. I used different colors of butter cream icing and a variety of decorating tips to make things a little fancy, but I certainly don't claim professional. Plus a four-year-old only naps for so long.

She practiced her new fingers today. All ready for someone to ask how old she is. Four fingers is much easier to hold up than three...go figure. Happy birthday sweetie. Enjoy your fourth year in which the best things are always pink.

Wednesday, January 21, 2009

Seven You Are

After Brendan and I had our annual birthday cake consultation, we decided that Yoda would be appropriate for year seven. This is what I came up with. I designed it much like the puppy cake from a couple of weeks ago. Two round cakes...one for the head with the second cut to form Yoda's ears (I think they're ears?) I called upon the force several times hoping that Yoda would look like Yoda rather than a scary green monster.

The most important critic was thrilled with his cake grinning ear-to-ear when he saw it. He commented on how he didn't know I could make a Yoda cake. I used that opportunity to rant off my creativity speech including how artists never really know how the end product will turn out and often question whether it will fulfill their vision. I went on to reinforce that attempting new things is what makes one grow as an artist. His response to that inspired burst of eloquence was, "It looks hard."

Yoda strikes me as a guy who is green all the way through so my sense of humor took great delight in making a green cake with a bit of food coloring. Brendan's out-of-town grandma asked him over the phone what flavor cake he had. He responded, "Green". She said, "No honey, I mean yellow, white or chocolate." Again Brendan correctly replied, "Green." We like to keep her guessing. ; )

In addition to the Yoda cake, you're looking at another first. I never ever thought I'd have a birthday party here. Brendan, this is proof that I love you very, VERY much.

Sunday, January 4, 2009

A sweet puppy

My first born turned ten a few days ago and oh how she wants a puppy. Unfortunately, Mom and Dad aren't ready to add the live kind to our household just yet so a sugary one had to suffice. Around here, as I've mentioned before, a homemade cake happens for every birthday in the shape of whatever the birthday child dreams up (that's within reason...this isn't Ace of Cakes.) Sometimes, I'll surf the Internet for inspiration and other times I'll just wing it. This time I was winging it.

Here's a very easy cake pattern if by chance there's a puppy lover with a birthday at your house. I used two cake mixes ...one filled the 10 inch cake pan and the other filled a 9 inch with batter left over (the leftover made extra cupcakes.) A furry cake is pretty easy to decorate since the icing doesn't need to be all perfect. I gobbed it on and swirled it this way and that to get the furry doggie effect. I used a lighter color of the fur icing to make the snout area and then used pink icing for the collar. The dogs eyes and nose (nose cut into proper shape) are peppermint patties. White chocolate chips decorate the collar. Finally, I did some very basic piping with black and white icing, but candy (licorice, etc) would also work to get a similar effect.

It's officially birthday season around here, so they'll be two more kids cakes happening between now and March. I'm not sure what shape those will take on yet...but I'll keep ya posted.

Tuesday, December 16, 2008

Eye candy

I managed to hold myself back and only produce six varieties this year...that being from top left, peppermint crunch, bear claws, caramel swirl pretzel rods, toffee bars, monogrammed chocolate D's and chocolate covered Oreos. yummmmm...

These little chocolates were new for me this year. I was at the counter, ready to purchase all of my candy making supplies, when I spotted the monogram candy molds. I'm a sucker (catch that candy pun?!) for type so the D mold quickly found itself in my cart. The helpful candy lady, sensing my enthusiasm about the prospect of making initial chocolates, pointed out the little foil wrappers in aisle three. She explained how to wrap the hardened chocolate and then lightly rub the front of the candy to make the D show through the foil. How cool is that?

Dare I say, I got a bit carried away? Although easy enough to make, wrapping all of these little guys took some time. I caught my hubby rolling his eyes once or twice at my idea of "scaled back" candy making. Worth it in the end, the red foil D's were the perfect bits of sparkle to pull the whole candy box presentation together.

Here's a peek into one of the final boxes for friends, family and teachers. Next week cookies. Let's wait until January to talk about the gym.