
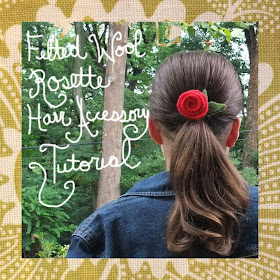
 The past week has been filled to the brim with design work, kid's homework and activities plus all the usual. That doesn't mean that I haven't been dreaming of new projects. Over the weekend, I took a crafty time out and made a half dozen or so of these happy rosettes from recycled felted wool sweaters. The idea stemmed from a rosey wreath project by Betz White in the new Holiday Crafts magazine by Better Homes and Gardens that I'm planning to make very soon.
 This tutorial focuses on a hair clip, but the idea can easily be adapted for pony tail holders, headbands and pins.
 In addition to felted wool (in the colors of your choice), you'll need a 3/8 inch coordinating ribbon, a hair clip, fabric scissors, fabric glue and a glue gun.
To felt wool: Place your thrifted or unwanted 100 percent wool sweaters in the washing machine. Wash on the HOT cycle. Place the sweaters in the dryer. Basically do all that you would never dare do with 100 percent wool sweaters and feel very rebellious. Next, go over to your local tattoo parlor...kidding. Do that after you make your rosettes.

For the patterns, left click on the above image and print. Your circle pattern should be approximately 3 inches. If for some reason your circle prints larger or smaller than three inches, adjust the print percentage as necessary.
 Using your pattern, cut a circle from the rose wool color. Then, cut a spiral shape using the pattern as a guide. It doesn't have to be perfect (no flower is) so wing it with confidence.
 Starting from the outside of the spiral, use fabric glue to attach at the bottom edge of the flower. Wind to shape the rosette.
  When you get to the end of the spiral, glue the flower to the end of the wool like so.
  To decorate the hair clip, take a coordinating color of 3/8 inch wide ribbon cut to 4 1/2 inches in length. Starting from the back of the clip, hot glue the ribbon up, around, over and under the clippie.
 Next, cut two leafs from the leaf-colored felted wool using the pattern as a guide. Hot glue the leaf shapes to the clip followed by the rosette.
Make a rosette to match every outfit. Take a deep breath, smile and go back to the real world. Tattoos optional.
really cute and a great way to use felt!
ReplyDeleteWhat a cute idea! Thanks for the great pics on the tutorial!
ReplyDeleteYou've inspired me! I have some felt that I didn't know what to do with. Thanks for sharing this. I'm sending my readers your way.
ReplyDeletehttp://comfortjoydesigns.blogspot.com/2009/09/fun-fall-tutorial.html
Really great tute, and inspiring as well. I've been dying to throw some of my old wool sweaters in the washer, and now I have a great excuse. Thanks for giving me the chance to be rebellious and crafty at the same time!
ReplyDeleteI've actually done this with paper loads of times and feel like a bit of a dunce that I didn't make that leap to felt. Duh! Thanks so much for the inspiration - love it x
ReplyDeleteI've tried to make felt roses before. And the process I made up was far more difficult, and time consuming than this one.
ReplyDeleteThank you. These roses are way cuter than mine, and look a hundred times easier. :)
I'll have to try this.
I have to try this! What a great idea - there are so many things that can be decorated with these - thank you!
ReplyDeleteAwesome tutorial! Can't wait to try it!
ReplyDeleteCongratulations June, great tutorial!!!
ReplyDeleteThanks!!!
Carine
Thank you for sharing this tutorial...bye bye, taced
ReplyDeletehttp://handmadecreativity.blogspot.com/
thanks for this tutorial!!! great roses!!
ReplyDeletehugs elisabetta
Thanks for your sweet comments!
ReplyDeleteCarinissima questa rosa! Grazie del tutorial
ReplyDeleteThis is so cute; I definitely have to make some for my little girls and their friends.
ReplyDeleteThanks so much. :)
This comment has been removed by the author.
ReplyDeleteJust want to say thanks, thanks, thanks for this lovely tutorial. Your flowers are so adorable and I love how easy it is to make. I did make one so far as a pin for my wool winter hat. Love it! I posted pics on my FB page and link'd back to your tutorial so everyone can see the inspiration.
ReplyDeleteI'm a big fan!
Edie
Thanks so much for this tutorial. I'm making some fabric fairy houses for the little girls on my Christmas list this year and these rosettes will look grand in the garden!
ReplyDeleteSuch a simple idea, but I wouldn't have come up with it myself!
I posted your tutorial on Craft Gossip Feltng: http://felting.craftgossip.com/2010/01/10/sweet-felted-sweater-rosettes-tutorial/
ReplyDelete♥ Linda
Muito fofo!!!
ReplyDeleteBeijos.
Thanks very much for this tutorial, it's so pretty and seems also easy!
ReplyDeleteKisses
Really enjoyed your blog and this simple way of making a cute flower barette.. thank you!!!
ReplyDeleteI want to thank you for this tutorial!
ReplyDeleteI'm from Italy, visit my blog!
http://nidodilana.blogspot.com
Bye!
Tiziana nidodilana
thank you. those roses are cute!. the step by step tutorial also give me such a big help. Thanks again.
ReplyDeleteThese are precious... thank you so much for sharing the tutorial :) I've just finished a frugal crafts round-up and hope it is okay that I featured your sweater rosettes. You can see it here: http://jamiebrock.hubpages.com/hub/Frugal-Crafts-15-Easy-Craft-Ideas
ReplyDeleteThank you so much for sharing this!